Table of Contents
Plastering covers the rough surfaces of walls, columns, ceilings, and other building components with a thin coat of plaster to make the surface smooth and durable.
Plastering on the externally exposed surface is called rendering.
Generally, cement plaster and lime plaster are used for plastering work.

1. Objectives of Plastering
Some objectives of plastering are:
a. To provide a smooth and finished surface.
b. To protect the surfaces against atmospheric effects.
c. To resist chemical actions.
d. To cover defects in the structure.
e. To give a decorative appearance.
2. Requirements for Good Plaster Material
The plaster material should fulfil the following requirements:
a. It should be hard and durable.
b. It should remain on the surface and protect from chemical attacks and weathering actions.
c. It should have good workability.
d. It should have high strength and durability.
e. It should be cheap and should be easily available.
f. It should protect from penetration of nature.
3. Tools Used in Plastering
( Note: Mobile users are requested to tilt mobile or zoom figures for the best experience. )
| Names | Images | Uses |
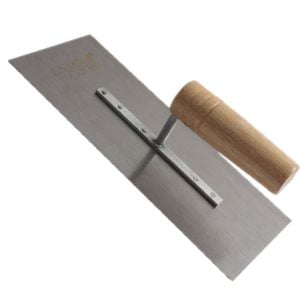
| 1. Trowel |  | Used for plastering and smoothing surfaces. |
| 2. Spackle Knife |  | Used for scraping surfaces or spreading material such as plaster in various construction trades. |
| 3. Spirit Level |  | Used to indicate how parallel (level) or perpendicular (plumb) a surface is relative to the earth. |
| 4. Straight edge |  | Used for ruling, cement render screeding, tiling, and as a general construction straight edge. |
| 5. Float |  | Used for making plaster smooth and flat. |
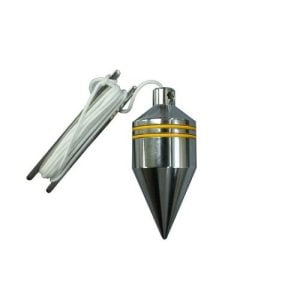
| 6. Plumb bob |  | Used to establish a vertical reference (called a plumb line). |
| 7. Floating Rule |  | Used to check the level of the plastered surface between the successive layers. |
| 8. Paddle Mixer |  | Used for ideal for quick and convenient mixing of paint, plaster, and more. |
| 9. Hammer |  | Used to chip out chunks of plaster and to re-secure or remove problematic pieces of lath. |
| 10. Plaster Sponge |  | Used for providing a final coat and finishing touch on plastered surface. |
| 11. Hawk |  | Used to carry mortar or plaster from the mixing table to the surface that’s being worked on. |
| 12. Tube Level |  | Used to transfer a vertical level across a distance. |
| 13. Water Brush |  | Used during the final smoothing stage of your plaster job. |
| 14. Thread |  | Used for checking the level of plaster of different structures. |
| 15. Bucket |  | Used to transport/carry mortar. |
| 16. Broom |  | Used during the final smoothing stage of your plasterwork. |
| 17. Shovel |  | Used to mix the cement, sand, and water. |
These are 17 construction tools list used in plastering work.
| Read Also: Ferrocement |
4. Types of Plasters Used In Plastering Work
There are two types of plaster used in plastering work. They are:
a. Gypsum Plaster
Gypsum is a soft sulfate mineral composed of calcium sulfate dihydrate (CaSO4·2H2O). It is generally found in the form of rock and is white.
Gypsum plaster is a paste formed by mixing the gypsum powder and water in a suitable proportion.

No sand is used in gypsum plaster. Only mixing of gypsum powder and water is done to prepare gypsum plaster.
This plaster is only used for interior plastering work.
b. Lime Plaster
When lime is mixed with the sand in the presence of the proper quantity of water, it is called lime mortar/ lime plaster, and the process of covering the surface of the walls, slabs, and columns by using lime plaster is called lime plastering.

Plastering may be single-coated or multi-coated.
The proportion of lime and sand for lime plastering is generally taken as 1:3 to 1:4.
This plastering is commonly used for interior works rather than the exterior.
c. Cement Plaster
When cement and sand are mixed with the proper quantity of water, cement plaster is formed, and the process of covering the surfaces with cement plaster is called cement plastering.

The generally used mixed proportion of cement and sand for cement plaster are 1: 4, 1:5, and 1:6.
Internal plaster – 1:6 or 1:5
External plaster – 1:4
Ceiling plaster – 1:3
Different grades for cement plaster are:
| Grade Name | Mortar Mix (by Loose Volume) | Compressive Strength at 28 days (in N/mm2) | |
| Cement | Sand | ||
| MM 0.7 | 1 | 8 | 0.7 to 1.5 |
| MM 1.5 | 1 | 7 | 1.5 to 2.0 |
| MM 3 | 1 | 6 | 3.0 to 5.0 |
| MM 5 | 1 | 5 | 5.0 to 7.5 |
| MM 7.5 | 1 | 4 | 7.5 to above |
d. Mud Plaster
This plaster is prepared by mixing an adequate percentage of clay and sand content. A small amount of cow dunk is added to this plaster to receive a better surface.
This plaster is environmentally friendly, and repairing work is easy and inexpensive.
5. Plastering Procedure
Plastering work should be done in the following steps:

a. The application surface should be made rough by raking out.
b. In case of the presence of cavities or holes, fill it in advance with suitable material.
c. All joints and application surfaces are cleaned out with the help of water and a wire brush. No traces of oils or greases should be left.
d. The application surface should be wet for at least 6 hours before plaster application.
e. For obtaining the uniform surface level, plaster patches of size 15 mm * 15 mm and a thickness of about 10 mm are used( Patches are also known as fixed dots ). Patches are set at an interval of 2m.
f. Verticality of fixed dots is checked with a plumb bob, and screeds are formed between dots.
g. Then, a base coat is applied to the surface between screeds using the trowel. The thickness of the base coat may vary between 9 to 15 mm.
h. The surface is levelled using a wooden float.
i. Let the base coat set but not let it dry. Then roughen the base coat by scratching.
j. Then surface or finishing coat is applied over the base coat.
k. The thickness of the finishing coat may vary between 2 mm to 3mm.
l. Finishing coat is levelled uniformly utilizing a wooden float.
m. Let the plastered surface dry, and after 12 hours, start the curing.
n. Curing should be done for at least 7 days to prevent problems like cracking in the future. As cement needs 28 days for complete hydration, curing for 28 days is best.
The plastering process of exterior and interior surfaces is the same. The only difference is that a waterproofing admixture is commonly added to the plaster to be used on exterior surfaces.
High-grade plaster is preferred to external plastering.
( Note: Plaster should always be done from top to bottom. )
| Read Also: Types of Concrete |

